In Mou theme, you may also upload and use your own fonts. This feature is available in Custom Fonts options page in the admin panel. Let’s figure out the fonts uploading process step-by-step.
⏩ Step 1
Before uploading the fonts to your website, you need to make sure that they are ready for use on the web. The theme supports popular .woff and .woff2 web-font formats. If your font package is missing files with those extensions (for example, you may have only .ttf or .otf files), you will need to convert the font files to .woff format. Otherwise, feel free to skip this step. There is a handy free online tool called Transfonter. It allows the conversion of fonts to web-compatible format.
Follow the steps below to convert the fonts .ttf or .otf to .wofff/woff2:
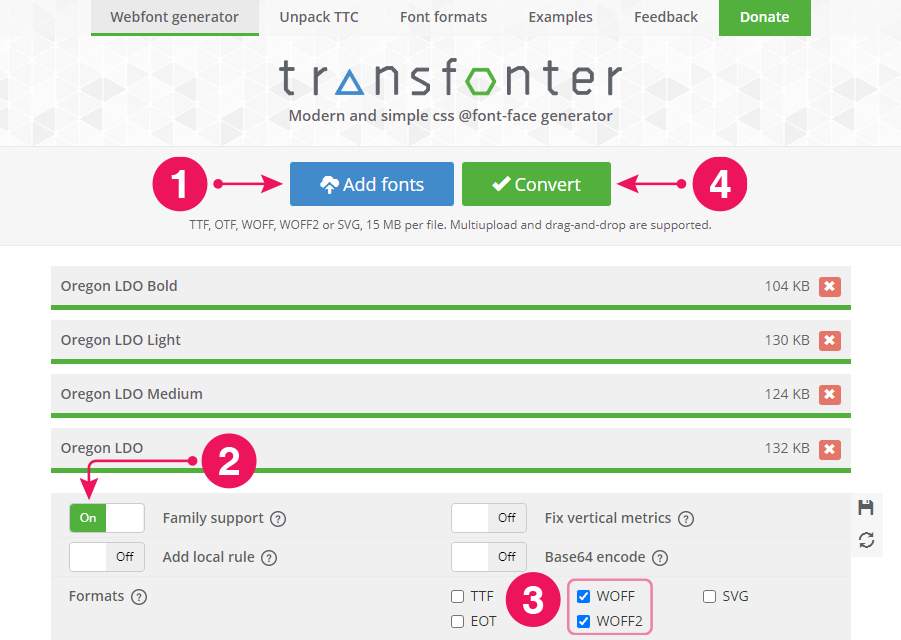
- Click on
Add fontsbutton to upload the fonts - Make sure Family support is
On - Make sure
WOFFandWOFF2are selected. - Click on the
Convertbutton
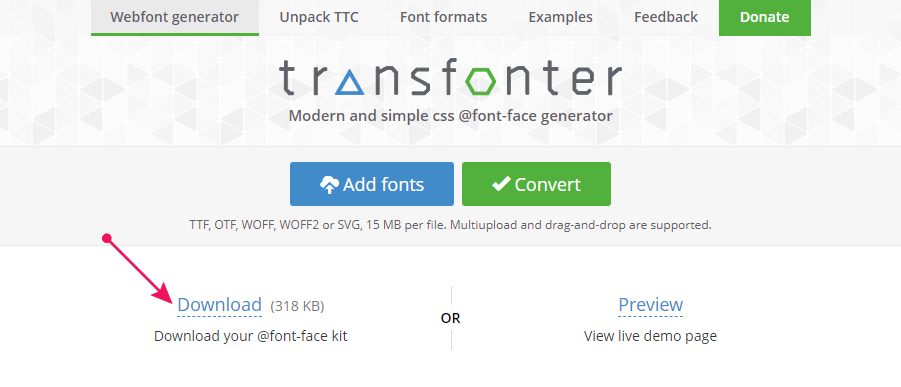
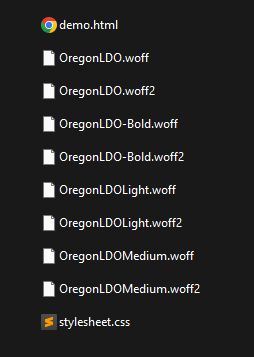
.zip archive of your fonts package.Unzip the archive and make sure that .woff or .woff2 font files are there.
⏩ Step 2
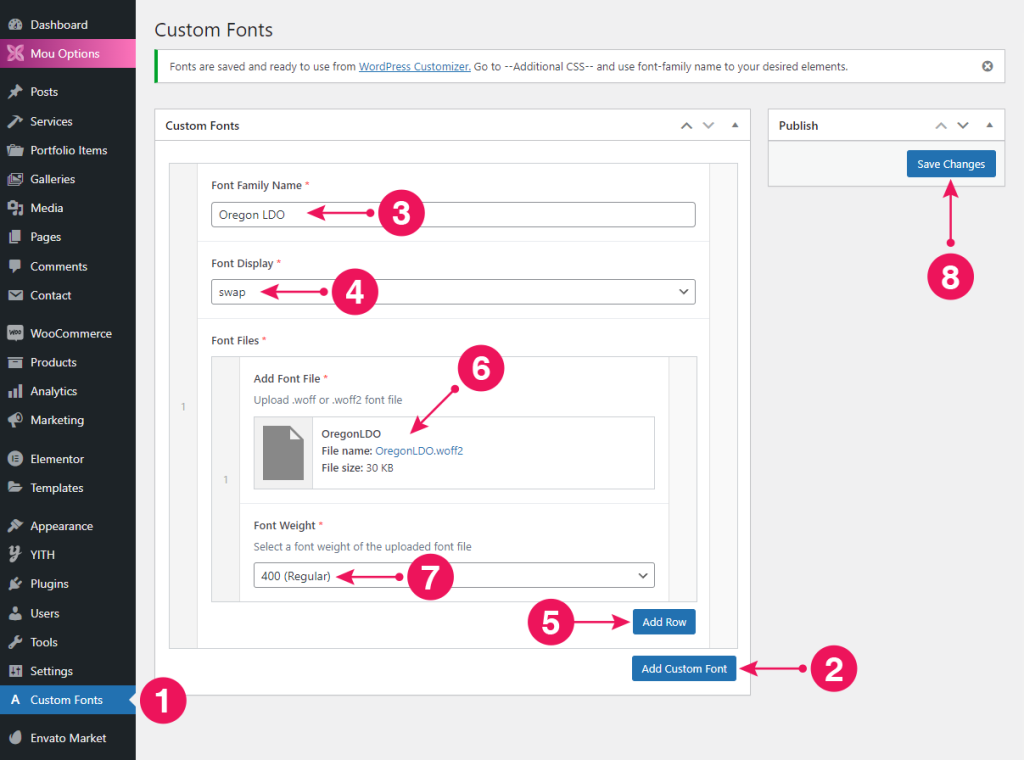
- From the Admin panel, navigate to
Custom Fontsto upload the fonts. - Click on
Add Custom Fontbutton - Input a
Font Family Name(e.g. Oregon LDO here) - Change
Font Displayoptions (e.g. swap here) - Now to upload the fonts click on
Add Rowbutton - Click on
Add Filebutton to upload the local fonts (I’m uploading .woff2 here) - Choose a
Font Weight(e.g. 400 Regular here) - Finally, click on the
Save Changesbutton to save the font files.
✨ Tips
To upload more font files, repeat Step 2 again. Then change the Font Family Name and Font Weight.
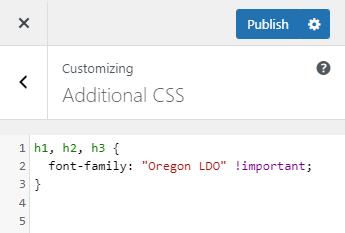
⏩ Step 3
- After clicking on the
Save Changesbutton, you’ll get a notification at top of this page with aWordPress Customizerlink. - Just click on that link to go to WordPress Customizer page or you can navigate to
Appearance > Customizefrom Admin panel. - Click on the
Additional CSStab to get the CSS Editor panel. - Add your selector (h1-h6/ p/ a/ span, etc.) and give your Custom Fonts Family Name. Follow the screenshots below.

✨ Tips
Also, there is a popular plugin Custom Fonts from Brainstorm Force to use custom fonts.